


Between themed parties, Halloween and Book Week, the cost of all the costumes in your kids’ toy box can start to add up. Collect your craft supplies, engage your creativity and save your wallet with these delightful and easy-to-make kids’ costume ideas.

DIY Kids’ Costume: Unicorn Headband

Step 1: Print out this unicorn headband stencil for the horn, ears and flowers. Using a pair of scissors, cut roughly around the stencils, leaving a thick white border around the edge.

Step 2: Starting with the horn, stick your stencil to white cardboard using either sticky tape or Blu Tack.
Step 3: Cut both pieces of paper, around the whole horn about 5mm away from the outline of the stencil. This will create the base of your horn.
Step 4: Take the same stencil and stick it to a piece of gold paper. Cut on the edge of each individual curve. This will create the pieces needed to create the horn pattern.
Step 5: Take all your gold pieces and use glue to adhere them to the white base to complete the horn.
Step 6: Repeat this stencil process with the ears and the flowers; sticking the outer ear stencils to white card, the inner ear stencils to pink paper and the flower stencils to any colour scheme of your choosing. Cut along the outline of each stencil to produce your patterns.
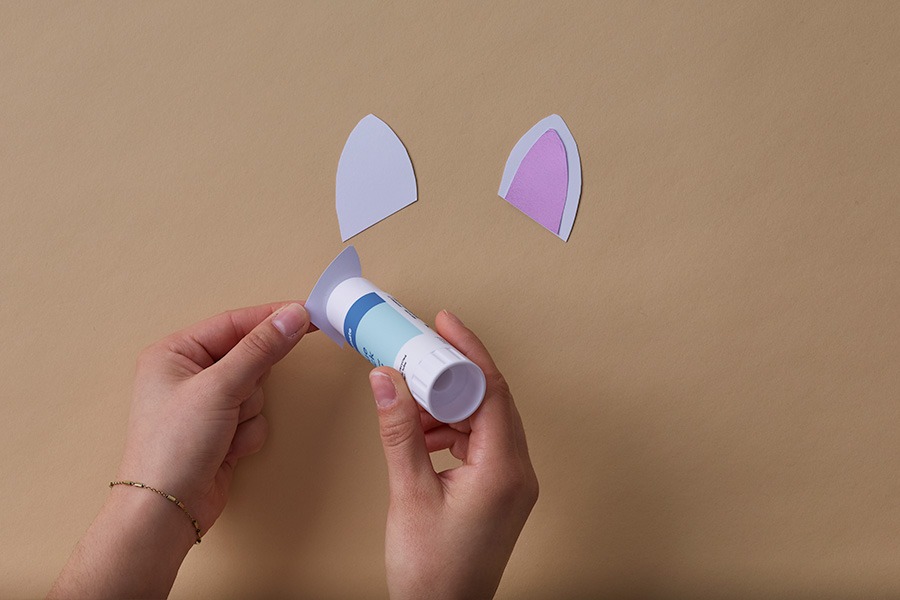
Step 7: Glue your centres on your flowers and your smaller ear pattern to the larger white pieces. Set aside.
Step 8: Taking a large piece of white card, measure a 10cm x 60cm thick strip for your headband.
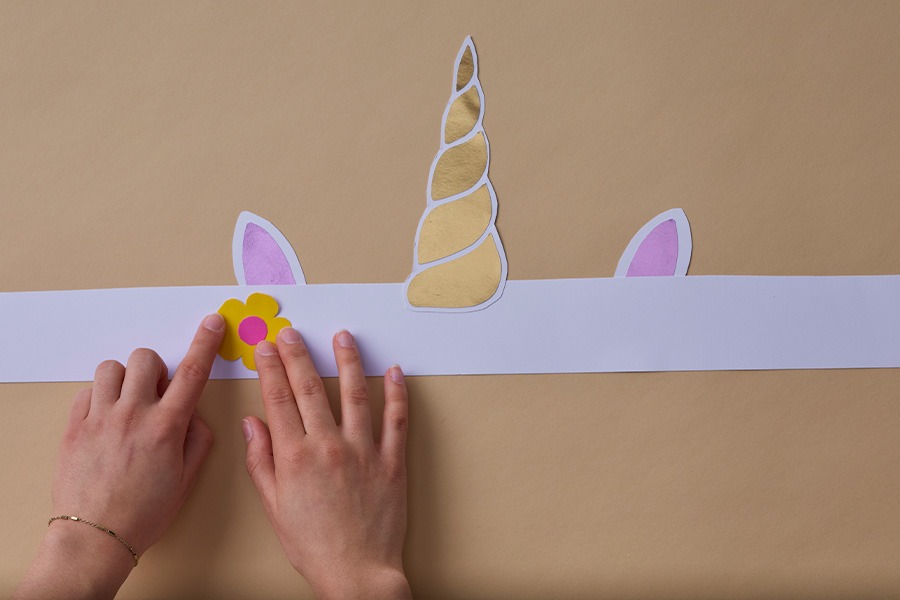
Step 9: To assemble, glue the horn on the outside of the headband in the centre, secure the ears on the inside on either side of the horn, then arrange the flowers along the outside front of the headband.

Step 10: Before fastening, estimate the size by wrapping the headband around your child’s head and mark where the pieces need to meet to achieve the correct size.
Step 11: Cut off any excess cardboard at the ends of the headband and use sticky tape to secure it together.
What You’ll Need
- Liviano A2 Colour Card 300gsm White
- Quill A4 Paper 125gsm 100 Pack Assorted
- Born A4 Cardstock Metallic 22 Pack
- Studymate Glue Stick 35g
- Maped Greenlogic Scissors 17cm
- Keji Adhesive Tape 18mm x 66m Clear 2 Pack
- Staedtler Natural Graphite Pencil HB
SEE ALSO: 4 Easy Book Week Costumes

DIY Kids’ Costume: Animal Face Mask
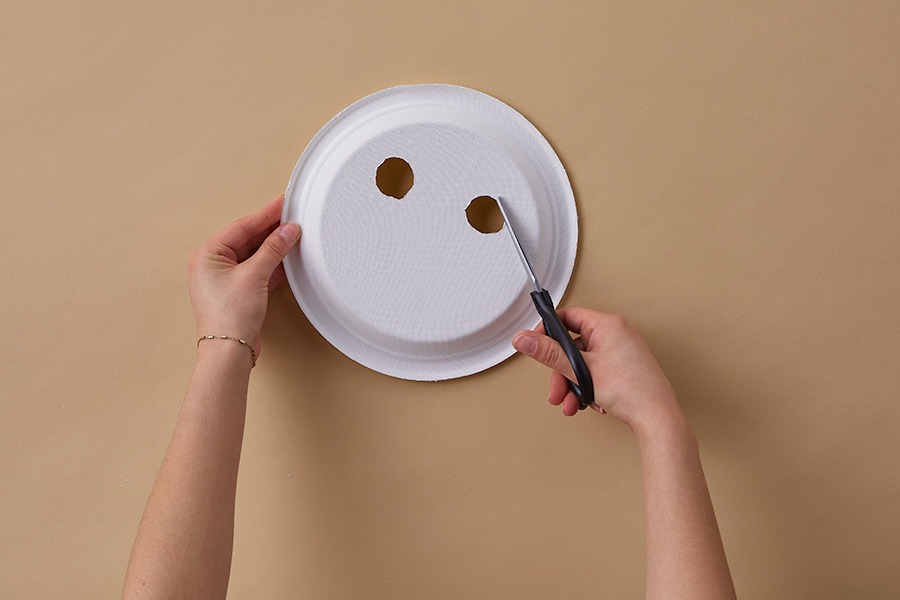
Step 1: On the underside of a paper plate, draw two small holes (about the size of a 20-cent piece) with a pencil to mark the eye holes of your mask. Use scissors to carefully cut these out.
Step 2: Sketch out your animal face. For this example, we’re creating a lion.

Step 3: Bring your animal mask to life with a pop of colour using acrylic paint and a paint brush. For this lion mask, we mixed red and yellow paint to create an orange.
Step 4: While waiting for the paint to dry, choose the coloured paper you will need to create the ears and any other features needed for your animal. For the lion, cut out semi circles of yellow and orange paper for the ears and 1cm-wide strips of yellow, brown and orange paper for the mane.
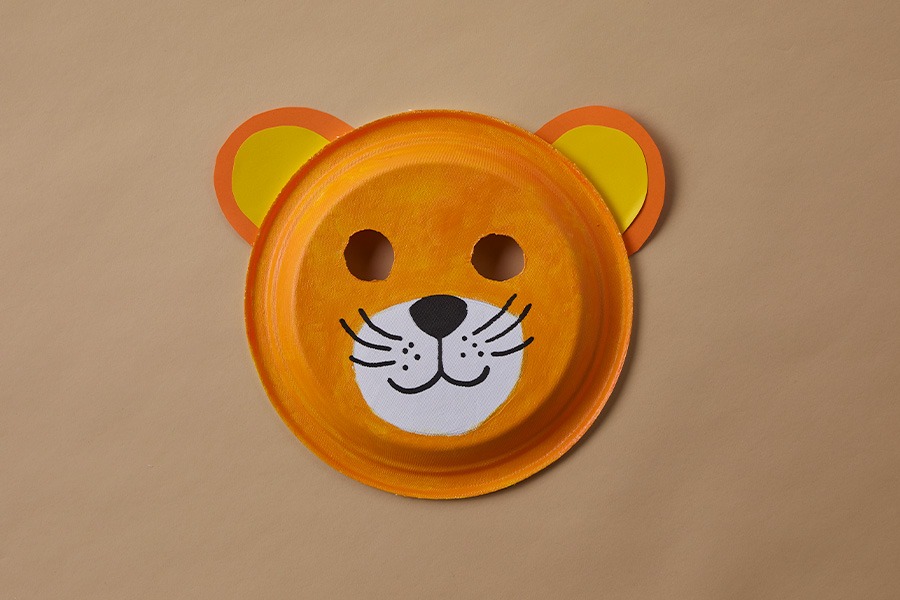
Step 5: Once your paint is dry, stick your animal ears on using glue or tape and use a paint marker to add in your animal’s facial details, including nose, mouth and whiskers.
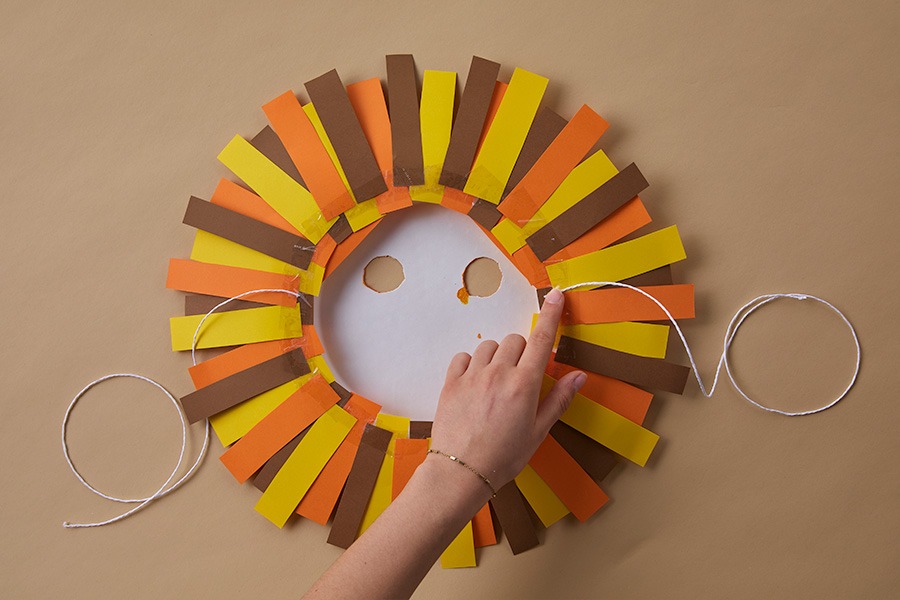
Step 6: Stick the strips of paper around the edge of the plate to create the mane. Add a few layers at different lengths to create volume.

Step 7: Cut two 30cm lengths of string or one 60cm piece of elastic and secure to the mask using sticky tape, or punch a hole on either side of the mask to tie the string through.
What You’ll Need
- J.Burrows Sugarcane Plates 225mm 80 Pack
- Staedtler Natural Graphite Pencil HB
- Maped Greenlogic Scissors 17cm
- Born Acrylic Paint 60mL Canary Yellow
- Born Acrylic Paint 60mL Carmine Red
- Born Round Flat Paintbrush Set Natural Hair 7 Pack
- Quill A4 Paper 125gsm 100 Pack Assorted
- POSCA PC 7M Paint Marker Black
- Keji Adhesive Tape 18mm x 66m Clear 2 Pack
- Kadink White Round Elastic 2mm x 5m
- Keji 1 Hole Plier Punch
